What Is the Full Roof Replacement Process for a Residential Home?
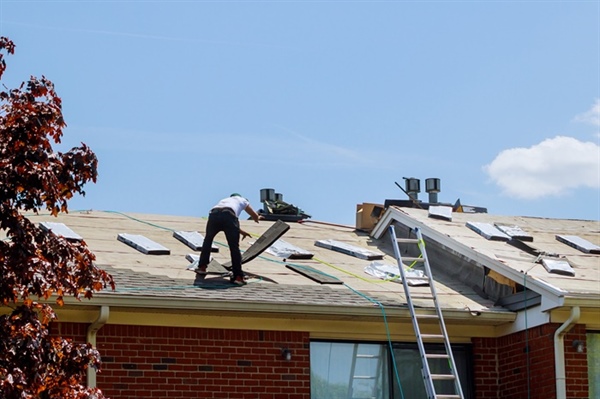
Replacing a residential roof is a structured process that involves careful planning, inspection, and installation. Many homeowners only notice roofing issues once leaks appear or shingles begin to deteriorate, but a full roof replacement requires much more than simply installing new materials. Contractors must evaluate the condition of the existing roof, remove worn components, prepare the structure, and install a new roofing system designed to protect the home for decades. Companies such as Amigo Roofing work with homeowners throughout this process to address structural concerns, material choices, and installation procedures that affect the long-term performance of a roof.
Understanding how the full replacement process works can help homeowners make informed decisions before work begins. Several key stages occur before, during, and after installation. A professional inspection helps determine whether replacement is necessary. The timeline for installation varies depending on roof size and materials. Homeowners also need to prepare their property before construction begins, and contractors must remove existing roofing materials safely before installing new systems. Once the installation is complete, final inspections verify the quality and durability of the work. Each of these stages plays a role in modern residential roofing projects and contributes to the long-term protection of the home.
Professional Roof Inspection Process Before a Residential Roof Replacement
A professional roof inspection is the first technical step that occurs before a full roof replacement. Roofing contractors evaluate both the exterior roofing materials and the structural components beneath them. Inspectors typically begin by examining shingles or other surface materials for curling, cracking, granule loss, or missing sections. These symptoms often indicate that the roof system has reached the end of its service life or that underlying issues such as poor ventilation or water infiltration may be present.
Roof inspections also involve examining the structural elements that support the roofing system. This includes checking decking integrity, flashing around roof penetrations, and drainage systems such as gutters and valleys. Inspectors look for evidence of moisture penetration, including water stains, mold growth, or deteriorated wood. Attic spaces are commonly inspected as well because ventilation and insulation conditions influence the lifespan of roofing materials.
The inspection process helps determine whether repair or full replacement is required. In many cases, widespread material degradation or structural issues make replacement the most practical option. Detailed inspection findings provide homeowners with a clear understanding of the roof’s condition and guide the planning of a new roofing system. The inspection phase is a standard step in modern residential roofing projects because it identifies hidden issues before installation begins.
Typical Timeline for a Residential Roof Replacement Project
The timeline for a residential roof replacement depends on several factors including roof size, complexity, material type, and weather conditions. In many residential projects involving asphalt shingles, installation may take between one and three days. Larger homes or roofs with multiple angles, dormers, and steep slopes require additional time because crews must work carefully around architectural features.
The replacement process generally begins with site preparation and protection of the property. Roofing crews position equipment, safety barriers, and debris containment systems before removal begins. Once the old materials are stripped from the roof deck, contractors inspect the underlying structure to verify that the decking is stable enough to support new materials. Any damaged decking panels must be replaced before the installation of underlayment and shingles.
Weather conditions also affect installation timelines. Roofing materials must be installed in dry conditions to maintain proper sealing and adhesion. Rain, high winds, or severe storms may temporarily pause work. Professional crews plan installation schedules carefully to minimize disruption while maintaining installation standards that protect the home over the long term.
How Homeowners Should Prepare Before a Roof Replacement Begins
Preparing a property before roof replacement helps protect personal belongings and allows roofing crews to work efficiently. One common recommendation involves clearing areas around the home where materials or debris could fall during removal. Patio furniture, grills, vehicles, and outdoor decorations are often moved away from the house before work begins.
Interior preparation may also be necessary because roofing work creates vibration throughout the structure. Homeowners frequently remove fragile items from walls and shelves to prevent damage. Attics should be checked as well because dust or small debris particles may enter during the removal stage. Covering stored items with protective sheets can help keep them clean during construction.
Communication between the contractor and homeowner is also part of preparation. Contractors usually explain project timelines, equipment placement, and access requirements. Understanding these details allows homeowners to plan for temporary noise, construction activity, and limited driveway access while the roofing project is underway.
Safe Removal and Disposal of Old Roofing Materials
Removing old roofing materials is a carefully controlled process designed to protect the home and surrounding property. Roofing crews begin by stripping shingles or other materials from the roof surface using specialized tools that allow workers to detach nails and lift materials efficiently. Removal usually proceeds in sections to maintain safe working conditions on the roof.
As materials are removed, they are directed into collection systems such as tarps or disposal chutes that lead to debris containers placed on the ground. These containers are typically large dumpsters designed specifically for construction waste. Containing debris prevents nails and fragments from spreading across the property and allows materials to be transported safely for disposal or recycling.
Many roofing materials are transported to licensed waste management facilities after removal. Some components such as asphalt shingles may be recycled and used in road construction or other industrial processes. Proper disposal procedures are part of professional roofing practices because they protect workers, homeowners, and the surrounding environment.
Final Inspections and Quality Checks After Roof Installation
Once new roofing materials are installed, a final inspection verifies that the system has been installed according to manufacturer specifications and building codes. Inspectors evaluate the alignment of shingles, flashing installation, ridge vent placement, and sealing around roof penetrations such as chimneys and vents. Proper installation in these areas prevents leaks and maintains the durability of the roof.
Contractors also examine the surrounding property to verify that debris has been removed and that nails or leftover materials have been cleared from the site. Magnetic tools are often used to collect stray nails from landscaping and driveways. Site cleanup is an important part of professional roofing projects because it protects homeowners from hazards after construction is complete.
Documentation and warranty information are often reviewed during the final stage as well. Installation records, product warranties, and maintenance recommendations help homeowners understand how to maintain the roofing system over time. Additional information about roofing services and project guidance can be found through Amigo Roofing.
Professional Help for Residential Roof Replacement Projects
A residential roof replacement involves multiple stages that require careful planning, experienced installation crews, and proper safety procedures. From the initial inspection and project planning to material removal and final inspection, every phase contributes to the long-term durability of the roofing system. Homeowners often have questions about timelines, preparation steps, and installation procedures before moving forward with a replacement project.
Amigo Roofing works with homeowners to guide them through the entire process. Their team evaluates roof conditions, explains replacement options, and coordinates installation schedules to minimize disruption. Professional crews follow structured procedures for removing existing materials, installing new roofing systems, and completing final inspections that verify the roof meets quality and safety standards.
Homeowners who want more information about roof replacement services can speak directly with the team at Amigo Roofing. The company is located at 1803 Buerkle Road Suite 102, White Bear Lake, MN and can be reached at (651)-204-0177. To learn more about available services or schedule a consultation, visit the company online and contact us.